Trail Route Profiles: A Guide to Sequence Planning
Why difficulty pacing and recovery rhythms matter more than trail ratings for multi-day rides
Learn how to read trail route profiles as progression architecture rather than trail checklists. This guide shows trip planners how to spot hidden recovery gaps, separate technical difficulty from physical load, and sequence multi-day rides that build confidence instead of breaking groups.
TL;DR
Trail ratings measure the trail, not the experience — Technical difficulty (surface, obstacles, grade) and physical demand (distance, elevation, altitude) are separate axes. Confusing them is the most common planning mistake in multi-day route design.
Groups break on the day after the hardest day — Cumulative fatigue makes a "moderate" day feel brutal when it follows consecutive demanding days. Recovery must be designed into the sequence, not left to chance.
Route sequencing is progression architecture — Effective multi-day itineraries follow a rhythm: calibration, progressive loading, recovery integration, and resolution. Each phase serves a specific purpose in the overall experience.
The final day shapes the story — Riders remember how they felt at the end. A well-sequenced trip closes with momentum and beauty, not exhaustion. This is what drives referrals and repeat bookings.
Ask terrain-specific questions, not rating-based ones — Surface composition, shade availability, altitude thresholds, and post-peak recovery design tell you more about a trip's quality than any difficulty grade ever will.
Guide Orientation: What This Covers and Who It's For
Trail route profiles and technical difficulty trails get reduced to numbers, color codes, and star ratings. This guide looks at everything those systems leave out: the sequencing decisions that determine whether a multi-day ride builds confidence or quietly dismantles a group.
This is written for adventure coordinators, travel agents, and trip planners who source multi-day mountain biking experiences for clients. If you evaluate routes on behalf of other people, this is for you.
By the end, you'll understand how to read a route sequence as a progression architecture rather than a list of trails. You'll know how to spot the hidden recovery gaps that break groups, how to separate technical difficulty from physical load, and how to ask the right questions when evaluating guided trip itineraries. This guide does not cover bike setup, gear lists, or single-trail technique. It's about the decisions that happen before anyone touches a pedal.
Why Route Sequencing Matters More Than Trail Ratings
Most trail descriptions hand you a difficulty grade and an elevation number. That's like rating a novel by its word count. The information is technically accurate and practically useless for predicting the experience.
The moment a multi-day sequence breaks a group isn't on the hardest day. It's the day after, when nobody planned for recovery. A rider who crushed a technical descent on day three wakes up on day four with forearms that won't grip, quads that won't fire, and a trail that was supposed to be "easy" but climbs 600 meters on loose gravel under midday sun. The rating said moderate. The body says otherwise.
This gap between description and experience is where client satisfaction collapses. Research in the European Journal of Geography found that longer trail sections assess required effort, while steep short sections indicate required technical skill, and exposed short sections indicate risk. These are three separate demands. Most itineraries treat them as one.
For adventure coordinators building referral-worthy trips, the cost of getting sequencing wrong isn't a bad review. It's the quiet erosion of trust: clients who come back tired instead of transformed, who remember the suffering more than the scenery. Getting this right means understanding that route planning is rhythm design, not checklist assembly.
Core Concepts: Separating What Ratings Measure from What Riders Feel
Technical Difficulty vs. Physical Demand
IMBA's trail difficulty rating system classifies trails using tread width, tread surface, grade, and obstacles, with categories from Easiest to Extremely Difficult. This measures the trail itself, not the rider's fitness. A technically difficult trail might be only 2 kilometers long. A technically easy trail might climb for 30 kilometers without shade.
As Dirty Freehub puts it, technical difficulty is "how skilled you should be with a bike," not the effort or physical demand of a route. This distinction is critical: a day that's technically simple can be physically devastating, and a day that's technically demanding can be physically light. Confusing these two axes is the single most common planning error.
Cumulative Load vs. Daily Load
A single day's elevation profile tells you about that day. It tells you nothing about what that day feels like after three preceding days. Cumulative fatigue changes everything: grip strength, reaction time, decision-making on technical features, and tolerance for heat and altitude. Route sequencing must account for the load riders carry from yesterday, not just the load they'll face today.
Trail User Engagement as a Planning Signal
Trail user engagement data, such as ride counts and average completion times, offers practical intelligence that static ratings miss. Trailforks data on a single technical route shows an average time of 14 minutes forward and nearly 18 minutes in reverse, demonstrating that direction alone changes measured effort by over 25%. These signals help planners understand how a trail actually rides, not just how it's classified.
The Framework: Progression Architecture for Multi-Day Routes
Think of a multi-day route as a musical composition, not a playlist on shuffle. It has movements, dynamics, tension, and release. The framework has four interconnected phases:
Calibration — Establish baseline and build group confidence
Loading — Introduce peak challenges with intentional escalation
Recovery Integration — Absorb fatigue before it compounds into failure
Resolution — Close with momentum, not exhaustion
These phases don't map neatly to day one, day two, day three. They overlap, repeat, and adjust based on terrain, weather, and group energy. The key insight: every loading phase must be followed by recovery integration, and the recovery day must be designed with as much care as the summit day. What follows is a step-by-step breakdown of how to execute each phase when evaluating or building a multi-day mountain biking itinerary.
Step-by-Step: Building a Route Sequence That Holds Together
Step 1: Map the Two Axes Before You Map the Route
Objective: Separate technical demand from physical demand for every day in the itinerary, so you can see the true shape of the trip.
Before evaluating any multi-day route, create a simple two-axis chart. The vertical axis is technical difficulty (trail surface, obstacle density, exposure). The horizontal axis is physical load (distance, elevation gain, altitude, heat). Plot each day of the itinerary on this chart. You're looking for the overall shape, not precision.
A well-designed sequence will show intentional movement across this chart: days that are high on one axis should generally be moderate on the other. Two consecutive days in the upper-right quadrant (high technical, high physical) is a red flag for any group that includes intermediate riders. IMBA's grading system defines Very Difficult and Extremely Difficult trails as reaching 15% to 20%+ maximum grade. Stacking those grades across consecutive days without modulation is where itineraries silently fail.
Anti-pattern: Evaluating each day in isolation. A "moderate" day following two hard days is not moderate. It's the hardest day on the trip, because it arrives when reserves are lowest.
Success indicator: You can articulate, for each day, whether the primary demand is skill-based or endurance-based, and you can see that the sequence alternates between these demands.
Step 2: Identify the Hidden Recovery Day (It's Not Where You Think)
Objective: Locate the point in the itinerary where cumulative fatigue peaks, and verify that recovery is designed into the sequence at that point.
The critical recovery window is not after the single hardest day. It's after the cumulative load reaches its highest point, which typically falls on day three or four of a five-to-seven day trip. This is the moment when the body's ability to repair overnight falls behind the daily damage. Sleep quality drops. Appetite changes. Minor discomforts become distractions that erode focus on technical terrain.
When evaluating an itinerary, ask: what does the day after the hardest sequence look like? If the answer is "another big day, but the terrain is easier," that's not recovery. Recovery means reduced total time in the saddle, lower elevation gain, and terrain that doesn't punish tired hands and legs. It might mean a shorter ride to a village with a long lunch, or a morning off followed by an afternoon cruise on flowing singletrack.
Guides who ride their terrain daily understand this intuitively. When Atlas Mountain Bike sequences multi-day rides through Morocco's Atlas Mountains, their local guides build recovery rhythms based on years of watching how riders respond to specific trail combinations, adjusting not just for the trail but for the accumulated load of preceding days.
Anti-pattern: Treating rest days as wasted days. A well-placed recovery ride is the most valuable day on the trip, because it's what makes the remaining days possible.
Success indicator: The itinerary includes at least one day with noticeably reduced physical and technical demand positioned after the cumulative load peak, not just after the single hardest day.
Step 3: Read the Terrain Between the Numbers
Objective: Translate elevation profiles and difficulty ratings into experiential reality by asking terrain-specific questions that ratings don't answer.
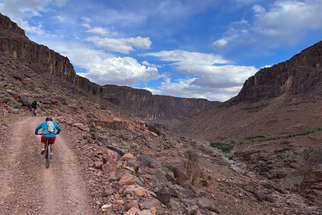
An elevation profile shows you a line going up and down. It doesn't tell you that the climb is on exposed switchbacks with no shade at 2,500 meters altitude, or that the descent is on loose shale that demands constant braking. These details change the experience completely.
When evaluating a route, ask the operator or guide these specific questions: What's the surface composition on the climbs? Where does shade disappear? What's the altitude range, and does the group cross any significant altitude thresholds? How much of the descent requires active braking versus flowing? Is there water available on the trail, or does everything need to be carried?
For context, HikeMetrics' intensity methodology explicitly includes distance, vertical gain, steepness, altitude, terrain type, exposure, and stability as separate factors. This confirms what experienced guides already know: a route profile is multi-factor, and collapsing it into a single difficulty number strips away the information that actually matters for planning.
Navigating Moroccan terrain requires this kind of granular understanding. A trail in the High Atlas at 3,000 meters feels nothing like the same gradient at sea level, even if the numbers look identical on paper.
Anti-pattern: Relying solely on elevation gain as a proxy for difficulty. A 1,200-meter climb on a paved road and a 1,200-meter climb on rocky mule track are fundamentally different experiences.
Success indicator: You can describe what each day feels like to ride, not just what the numbers say. You know where the hard parts actually are within each day, not just the daily total.
Step 4: Design the Opening Day as a Calibration Instrument
Objective: Use day one to establish group baseline, build confidence, and give the guide (or operator) actionable information about rider capabilities.
The opening day of a multi-day sequence serves a purpose beyond "getting started." It's a diagnostic tool. The terrain should include a representative sample of what's coming: a moderate climb, a technical section that's challenging but not punishing, and enough variety to reveal each rider's comfort zones and limits.
This is where guide-led operations have a structural advantage over self-guided itineraries. A skilled guide uses day one to read the group: who brakes too hard on descents, who struggles with sustained climbing, who has more skill than fitness or more fitness than skill. This information reshapes the pacing, rest stops, and sometimes even the route choices for subsequent days.
For trip planners evaluating itineraries, look at day one critically. If it's the easiest day by a wide margin, it won't provide useful calibration. If it's among the hardest, it risks demoralizing riders before the trip has built any momentum. The ideal opening day sits at about 60-70% of the trip's peak intensity, with enough technical variety to surface the group's actual (not self-reported) abilities.
Anti-pattern: Starting with a "warm-up" day that's so gentle it provides no useful information about how the group will handle real terrain. Also: starting with the hardest day to "get it out of the way."
Success indicator: After day one, the guide (or you, as the planner reviewing trip reports) can describe each rider's strengths and limitations with specificity.
Step 5: Sequence the Peak Challenge with an Exit Ramp
Objective: Position the trip's most demanding day where riders have built enough capacity to meet it, and ensure the following day provides genuine recovery.
The peak challenge day should never be day one or the final day. It belongs in the second half of the trip but not at the very end. Riders need the preceding days to acclimate to altitude, trail surfaces, daily rhythm, and their own bike setup. They also need at least one day after the peak to process the experience physically and emotionally before the trip concludes.
Consider the difference between a multi-stage route through the Atlas Mountains to the Sahara that places its biggest pass crossing on day four of six versus day six of six. In the first scenario, riders summit with two days of trail legs under them and wake up the next morning knowing they've already done the hardest thing. The remaining days become a victory lap. In the second scenario, riders finish the trip at their most depleted, and the lasting memory is exhaustion rather than accomplishment.
The exit ramp after the peak day is non-negotiable. This doesn't mean a rest day with no riding. It means a day where the terrain rewards rather than tests: flowing descents, scenic traverses, cultural stops, shorter total distance. The body recovers. The mind shifts from survival to enjoyment.
Anti-pattern: Placing two peak-intensity days back to back because the terrain "requires" it. If the terrain requires it, the route needs redesigning, not the riders.
Success indicator: The peak day is preceded by a progressive build and followed by a noticeably lighter day. Riders describe the peak day as a highlight, not an ordeal.
Step 6: Close with Momentum, Not a Whimper
Objective: Design the final day to leave riders feeling capable and satisfied, creating the emotional imprint that drives referrals and rebookings.
The last day shapes the story riders tell. If it's a slog to the finish, that's the memory. If it's a beautiful, flowing ride that feels earned, that's what they'll describe to friends. The final day should be moderate in both technical and physical demand, with the best scenery the route offers and a clear, satisfying endpoint.
This is where the variety of mountain biking experiences in Morocco becomes a sequencing asset. A trip that spent days in high, rocky passes can close with a descent through terraced villages into a valley, shifting the sensory palette from austerity to abundance. The contrast itself creates a sense of journey completed.
For adventure coordinators, evaluate the final day of any itinerary with one question: will riders finish this day wanting to ride again tomorrow? If the answer is yes, the sequencing worked. If the answer is "they'll be glad it's over," the trip's emotional architecture needs revision.
Anti-pattern: Treating the final day as logistical filler (a short transfer ride to the airport). Also: making the final day too easy, which can feel anticlimactic after days of genuine challenge.
Success indicator: Post-trip feedback emphasizes the journey's arc and the final day's beauty, not relief that it's over.
Practical Example: Reading a Five-Day Atlas Mountains Itinerary
Consider a hypothetical five-day mountain biking itinerary through Morocco's High Atlas. Here's how progression architecture applies:
Day 1: 35 km, 600 m elevation gain. Mixed surface (paved road transitioning to dirt track). Moderate technical demand. Purpose: calibration. The guide watches how riders handle the transition from pavement to dirt, how they manage a sustained but moderate climb, and how they descend on loose gravel.
Day 2: 40 km, 900 m elevation gain. Rocky singletrack with two technical descents. High technical demand, moderate-high physical demand. Purpose: loading begins. Riders are fresh enough to engage with challenge. The guide adjusts pacing based on day one observations.
Day 3: 28 km, 500 m elevation gain. Flowing trail through a river valley with village stops. Low-moderate technical and physical demand. Purpose: recovery integration. This is not a wasted day. It's the day that makes day four possible. Cultural immersion replaces physical intensity.
Day 4: 30 km, 1,200 m elevation gain. High pass crossing on exposed terrain at altitude. Peak challenge. High physical and moderate-high technical demand. Purpose: summit day. Riders arrive with recovered legs and the confidence of three days of successful riding.
Day 5: 25 km, 200 m elevation gain (mostly descent). Flowing descent through terraced hillsides to a valley town. Moderate technical demand, low physical demand. Purpose: resolution. Riders finish with smiles, dust on their faces, and a story they want to tell.
Notice what a standard trail description would show: five days, varying distances and elevations. What it wouldn't show is the intentional rhythm. Day 3 looks "easy" on paper but is the structural keystone of the entire trip. Remove it or replace it with another demanding day, and day 4 becomes a survival exercise instead of an achievement.
Common Mistakes and Pitfalls in Trail Route Profiles
Trusting self-reported fitness. Clients overestimate their abilities. Calibration days exist precisely because "I ride every weekend" means different things to different people. Build the itinerary for the group's actual level, revealed on day one, not the level described in booking emails.
Ignoring altitude as a multiplier. Everything is harder above 2,000 meters. A climb that's manageable at sea level becomes a different proposition at altitude. If the itinerary gains significant altitude, the difficulty ratings understate the real experience.
Confusing variety with recovery. Switching from singletrack to a gravel road is a change of stimulus, not a rest. Recovery requires reduced total load, not just different terrain.
Planning for the strongest rider. The trip's pace is set by the group's middle, not its front. An itinerary that thrills the strongest rider and breaks the weakest produces one happy client and several who won't return.
Skipping the emotional arc. A trip that's consistently moderate is forgettable. A trip that's consistently hard is punishing. The memorable trip has contrast: struggle and ease, exposure and shelter, effort and reward.
What to Do Next
Start with one itinerary you're currently evaluating or have recently sold. Plot each day on the two-axis chart (technical vs. physical demand). Look for where two high-demand days sit back to back without a recovery buffer. That's your first fix.
Then ask your operator or guide three questions about the route that ratings don't answer: where does shade disappear, what's the surface on the climbs, and what does the day after the hardest day look like? If they can answer with specificity, you're working with someone who understands progression architecture. If they point you back to a difficulty rating, keep looking.
This framework isn't a rigid formula. It's a lens for reading itineraries with the same intelligence that experienced guides bring to trail design. Use it as a reference each time you evaluate a new route, and refine your instincts over time. The riders your clients become after a well-sequenced trip are different from the riders who started it. That transformation is what generates the referrals that build your business.
Frequently Asked Questions
What is the IMBA Trail Difficulty Rating System and what does it actually measure?
IMBA's system classifies trails by technical difficulty using tread width, surface type, grade, and obstacles. It ranges from Easiest (under 5% grade, wide smooth tread) to Extremely Difficult (20%+ grade, narrow tread with unavoidable obstacles). Crucially, it measures the trail's characteristics, not the physical effort required to ride it. A short, steep, rocky trail can rate as Very Difficult even though it takes 15 minutes to complete. A long, smooth climb might rate as Easy despite exhausting riders over four hours.
Why do groups fall apart on the "easy" day, not the hard one?
Cumulative fatigue is invisible in daily ratings. After two or three demanding days, the body's overnight recovery can't keep pace with the daily damage. Grip strength, reaction time, and mental focus all decline. A day rated moderate on paper arrives when riders are at their most depleted, making it functionally the hardest day of the trip. This is why recovery integration (a genuinely lighter day positioned after cumulative load peaks) is essential to any multi-day sequence.
How should I evaluate whether a guided trip itinerary is well-sequenced?
Plot each day on two axes: technical demand and physical demand. Look for intentional alternation between these demands rather than consistent escalation. Check that the hardest day falls in the second half but not the final day. Verify that a recovery day follows the peak challenge. Ask the operator what the day after the hardest day looks like in detail. Well-sequenced itineraries show contrast and rhythm, not a flat line or a relentless upward curve.
Can trail user engagement data help with route planning?
Yes. Platforms like Trailforks provide ride counts, average completion times, and directional time differences that reveal how trails actually ride versus how they're classified. A trail that takes 25% longer to ride in one direction than the other tells you something about sustained climbing or technical braking demands that a difficulty rating alone won't capture. Use engagement data as a supplement to ratings, not a replacement for guide knowledge.
How does altitude affect route sequencing decisions?
Altitude acts as a multiplier on physical demand. A climb that's comfortable at 500 meters becomes significantly harder at 2,500 meters due to reduced oxygen availability. Itineraries that gain altitude progressively allow riders to acclimate, while those that jump to high elevation early risk fatigue, headaches, and reduced performance that compounds across subsequent days. If a route crosses significant altitude thresholds, the difficulty ratings will understate the actual experience.
What questions should I ask a tour operator about their route sequencing?
Go beyond "how hard is it" and ask: What does the surface look like on the climbs? Where does shade disappear? What altitude thresholds does the route cross? What does the day after the hardest day look like, and why? How does the guide adjust pacing based on group performance on day one? Operators who can answer these questions with terrain-specific detail (not generic difficulty ratings) are the ones whose trips produce the best client outcomes.