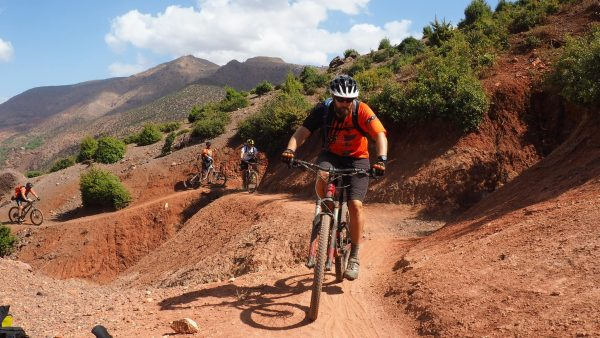
Trail Assessment: A Guide to Reading Terrain Like a Pro
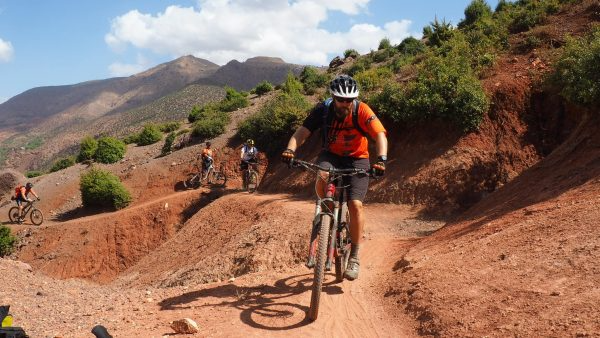
How to translate trail difficulty metrics into real-world group experience across multi-day rides
Learn why standard trail assessment data fails mixed-ability groups on multi-day trips and how to read terrain the way experienced guides do. This guide gives trip planners a practical framework for predicting cumulative fatigue, morale shifts, and hidden trail variables.
TL;DR
Trail descriptions describe terrain, not experience - Distance, elevation gain, and difficulty ratings are useful starting points but structurally incapable of predicting how a group will feel on day three of a multi-day ride.
Cumulative fatigue is the missing variable - The same "moderate" trail feels categorically different when ridden on fresh legs versus after two days of riding at altitude. No rating system accounts for this.
Sequence matters more than individual trail difficulty - How you order riding days (calibration, loading, recovery, resolution) determines group satisfaction more than the difficulty of any single day.
Calibrate for your weakest rider, not your average - The person who struggles most will define the group's experience. Pre-trip fitness assessment and real-time guide attention are essential.
Ask experiential questions, not data questions - The best test of an outfitter's trail knowledge is whether they can describe what a trail feels like for a tired rider, not just what it measures.
Guide Orientation: What This Covers and Who It's For
This guide is about the gap between what a trail assessment tells you on paper and what your group actually experiences on the trail. Specifically, it addresses the accumulated fatigue, morale shifts, and hidden terrain variables that standard trail difficulty metrics fail to capture, and how to read those signals before they become problems.
It's written for adventure coordinators, travel agents, and trip planners who send mixed-ability groups on multi-day mountain biking trips. If you've ever had a client come back from a trip saying "day three broke us," this is for you.
By the end, you'll understand why gradient profiles and rating systems are necessary but incomplete, how experienced guides translate terrain data into felt experience, and what questions to ask before committing a group to a multi-day route. This is not a technical manual for trail building or a review of classification systems. It's a practical framework for reading trails the way a guide does.
Why Trail Assessment Matters More Than You Think
Most trail descriptions do exactly what they promise. They give you distance, elevation gain, a difficulty label, and maybe a surface type. That information is accurate. It's also dangerously incomplete when you're planning consecutive riding days for a group that includes a 34-year-old weekend warrior, a 48-year-old returning to the bike after a decade, and a coordinator who needs everyone smiling at dinner.
The problem isn't bad data. The problem is that trail difficulty metrics were designed to describe individual trails in isolation, not to predict how a human body and mind respond to three or four of them strung together. IMBA's Trail Difficulty Rating System explicitly separates technical challenge from physical exertion, advising riders to evaluate trail length, elevation change, and average grade independently. That's sound methodology for a single ride. But it doesn't account for the fact that a "moderate" climb on day three feels categorically different from the same climb on day one.
A 2023 study in the European Journal of Geography frames trail difficulty across three dimensions: effort, technique, and risk. That third dimension, risk, includes psychological strain. The kind of tired that makes a rider hesitate before a switchback they'd have cleaned easily two days ago. If you're sourcing trips for clients, that hesitation is where satisfaction erodes, reviews turn lukewarm, and referrals dry up.
Understanding what trail descriptions leave out isn't academic. It's the difference between a trip your clients talk about for years and one they quietly forget.
Core Concepts: The Language of What's Missing
Trail Difficulty Metrics vs. Felt Difficulty
Trail difficulty metrics are the quantifiable variables: gradient, distance, surface type, technical feature frequency. Vermont's IMBA guidelines recommend collecting trail width, trail length, average grade, maximum sustained grade, feature dimensions, and feature frequency to rate mountain bike trails. These are useful inputs. But they describe the trail, not the rider's relationship with the trail over time.
Felt difficulty is what accumulates. It includes muscle fatigue from previous days, cognitive load from navigating unfamiliar terrain, altitude effects, heat exposure, and the psychological weight of knowing there's another full day of riding tomorrow. No rating system captures this because it's not a property of the trail. It's a property of the interaction between trail, rider, and sequence.
Experiential Translation
Experiential translation is the process of converting trail data into a prediction of how a specific group will actually feel riding that trail on a specific day. This is what experienced guides do instinctively. They look at a route profile and think: "This 400-meter climb comes after a rocky descent that will drain grip strength. By the time they hit the switchbacks, their forearms will be cooked." That's not information you'll find in any trail description.
Cumulative Load
Cumulative load is the total physical and mental demand placed on a rider across consecutive days. It's non-linear. Day two doesn't feel twice as hard as day one. It might feel 1.2 times as hard, or it might feel three times as hard, depending on recovery quality, nutrition, sleep altitude, and whether day one ended with a confidence-building descent or a demoralizing mechanical failure. This is the variable that trail descriptions are structurally incapable of addressing.
The Framework: Reading Trails Like a Guide
The method here isn't a checklist. It's a translation process with five stages, each designed to layer experiential intelligence onto the raw data that trail descriptions provide. Think of it as moving from what the trail is to what the trail does to a group over time.
The five stages are:
Decode the Profile — Read what the numbers actually mean for bodies on bikes
Map the Hidden Variables — Identify what the description omits
Sequence for Cumulative Load — Arrange days to manage fatigue, not just difficulty
Calibrate for Your Weakest Rider — Design the experience around the person who needs it most
Build in Escape Valves — Create options that prevent small problems from becoming trip-defining ones
These stages aren't strictly sequential. You'll move between them as you evaluate a route. But together, they form the spine of a trail route profile that actually predicts group experience rather than just describing terrain.
Step-by-Step: Translating Trail Data Into Rider Experience
Step 1: Decode the Profile Beyond the Summary
Objective: Understand what the raw numbers mean for riders in motion, not just on paper.
Trail descriptions typically give you a headline: 28 km, 850 m elevation gain, rated "intermediate." That's a starting point, not an answer. The U.S. National Park Service uses a formula (elevation gain × 2 × distance, then square root) to produce a numerical difficulty rating. It's elegant and useful for comparing hikes. But it tells you nothing about where the elevation gain falls in the ride, whether it comes in one sustained grind or six punchy climbs with recovery between them, or whether the final 5 km are uphill when legs are already spent.
Start by requesting or building an elevation profile that shows gradient distribution, not just total gain. Look for where the steepest pitches fall relative to the ride's midpoint. A 15% grade in the first hour is a different experience from a 15% grade in the fourth hour. Ask about maximum sustained grade, not just average grade. A trail with a 4% average grade could hide a 2 km section at 12% that will stop your least-fit rider cold.
Anti-pattern: Trusting the "intermediate" label without interrogating the underlying data. Labels collapse distinct variables (surface, technical features, climbing difficulty, distance) into a single word. IMBA explicitly warns against this , noting that surface type, technical features, climbing difficulty, and distance should not be compressed into a single easy/moderate/difficult designation.
Success indicator: You can describe the ride's effort arc in plain language: "Steady climbing for the first 90 minutes, a technical descent that demands focus, then rolling terrain to camp." If you can't narrate the ride's rhythm, you don't yet understand the profile.
Step 2: Map the Hidden Variables
Objective: Identify the factors that shape rider experience but don't appear in trail descriptions.
The European Journal of Geography's difficulty framework lists variables under its "technique" dimension that most trail descriptions ignore entirely: short-pitch inclination, obstacles, step height, scree crossings, and water-body crossings. These are the features that drain energy disproportionately to their distance. A 200-meter rocky section might take 3 minutes to ride but cost 20 minutes of recovery in focus and grip strength.
Beyond technical features, hidden variables include: exposure to sun (a shadeless traverse at 2,000 meters in Morocco is a fundamentally different experience than the same gradient in a forest), wind direction and typical afternoon patterns, altitude effects on riders coming from sea level, and the psychological impact of exposure on narrow trails. In the Atlas Mountains, a trail might cross from a sheltered valley into an exposed ridgeline, and that transition changes everything about how a rider feels, even if the gradient stays constant.
Ask your guide or outfitter about these specifics. If they can't answer, that tells you something about the depth of their trail knowledge.
Anti-pattern: Assuming that trail amenities (water points, rest areas, shade structures) compensate for hidden difficulty. They help, but they don't change the fundamental demand of the terrain.
Success indicator: You've identified at least three variables per trail day that don't appear in the standard description but will meaningfully affect how riders feel.
Step 3: Sequence for Cumulative Load
Objective: Arrange riding days so that fatigue accumulates predictably and manageably, rather than compounding into crisis.
This is where most trip planning goes wrong. Coordinators sequence days by difficulty rating: easy, medium, hard, medium, easy. That looks logical on a spreadsheet. But cumulative load doesn't follow a spreadsheet. A "medium" day after a "hard" day can feel harder than the hard day itself, because riders start with depleted reserves, sore muscles, and (often) disrupted sleep from altitude or unfamiliar beds.
The better approach is to think in terms of progression architecture : calibration, loading, recovery integration, and resolution. Day one calibrates the group, establishing baseline fitness and confidence. Days two and three load effort strategically, with the hardest physical demand falling when riders are warmed up but not yet depleted. Recovery is integrated within riding days (not just as rest days), through descents, lunch stops at scenic points, and shorter afternoon segments. The final day resolves the trip with a ride that feels achievable and rewarding, not like a forced march to the finish.
A guide who rides these trails daily understands this intuitively. They know that the descent into Imlil Valley gives legs and spirits a lift right when riders need it, and they'll position it accordingly.
Anti-pattern: Front-loading the easiest days. This wastes the period when riders have the most energy and sets up a trajectory where every subsequent day feels harder.
Success indicator: Your itinerary has a deliberate effort arc that you can explain to a client in one sentence. "We build through days two and three, then the terrain opens up and rewards you."
Step 4: Calibrate for Your Weakest Rider
Objective: Design the experience so that the least-fit or least-experienced rider in the group finishes each day feeling challenged but not broken.
This sounds obvious. It's rarely done well. The instinct is to plan for the group's average ability. But in a mixed-ability group, the average doesn't exist as a person. You have individuals, and the person who struggles most will define the group's experience more than the person who finds it easy. When one rider is walking their bike up a climb while three others wait at the top, everyone's day changes.
Calibration starts before the trip. A genuine pre-trip fitness check should assess sustained climbing endurance, technical handling confidence, heat tolerance, and recovery capacity. Not just "how often do you ride?" but "how do you feel on the third hour of a ride in warm conditions?" Those answers predict day-three performance far better than any trail rating.
On the trail, calibration means your guide is reading the weakest rider constantly. Not hovering, but noticing: are they drinking enough? Have they gone quiet? Are they looking at the trail or at the ground in front of their wheel? These are signals that data can't capture and that only a guide with deep familiarity with both the terrain and the human response to it can interpret in real time. This is the kind of local expertise that operators like Atlas Mountain Bike build their trips around, with guides who've ridden every switchback and know exactly where a struggling rider needs encouragement versus a breather.
Anti-pattern: Telling the weakest rider "you'll be fine" without adjusting the plan. Encouragement without adaptation is just pressure with a smile.
Success indicator: Your weakest rider finishes each day tired but talking about what they saw, not about how hard it was.
Step 5: Build in Escape Valves
Objective: Create decision points within each day where the route can be shortened, rerouted, or modified without derailing the trip.
Escape valves are the difference between a guide-led trip and a GPS track. They're the points where a guide can say: "The original plan takes us over the ridge, but the wind is strong today and two riders are flagging. We'll take the valley route instead. You'll miss the summit view but gain a river crossing and an easier final hour." That's not a failure. That's responsive trip design.
When evaluating a route or an outfitter, ask where the decision points are. Can the day be split? Is there a vehicle access point at the midpoint? Can a rider opt out of a technical section without being separated from the group for hours? In the Atlas Mountains, the network of mule tracks, village roads, and shepherd paths means that a knowledgeable local guide often has three or four route variations available at any given junction. That flexibility is invisible in a trail description but essential to group satisfaction.
For adventure coordinators sourcing trips, escape valves are also your insurance policy. They're how you ensure that a client's bad knee or unexpected altitude headache doesn't become a one-star review. Ask your outfitter: "What happens if someone can't finish day three?" The answer will tell you more about the quality of the operation than any trail rating ever could.
Anti-pattern: Treating the planned route as the only route. Rigidity is the enemy of good group experiences in variable terrain.
Success indicator: You can identify at least two bail-out or modification options for every riding day, and your guide knows them without checking a map.
Practical Examples: What This Looks Like on the Ground
Scenario 1: The Misleading "Easy" Day
A trail description reads: 22 km, 350 m elevation gain, mostly doubletrack, rated "easy." On paper, this is a recovery day. In reality, the trail crosses an exposed plateau with no shade at 1,800 meters. The doubletrack is loose gravel that demands constant micro-corrections. A steady headwind adds 15% to perceived effort. By the time the group reaches the descent, they're more fatigued than after the previous day's "moderate" ride with 700 m of climbing through shaded forest.
A guide who knows this trail would position it differently in the sequence, ensure extra water is carried, brief riders on the exposure, and possibly start 30 minutes earlier to avoid peak heat. None of that information exists in the trail description.
Scenario 2: The Group That Split on Day Three
A coordinator booked a four-day trip for eight riders. Days one and two went well. Day three featured a long climb with a technical middle section. By the halfway point, three riders were 40 minutes behind the front group. The guide had to split attention. The fast riders got bored waiting. The slow riders felt embarrassed. Dinner was quiet.
The fix wasn't a different trail. It was a different sequence. If the technical climb had fallen on day two (when legs were fresher and confidence was higher), and day three had offered a more flowing, descending route , the group would have stayed together. The trail data was identical in both scenarios. The experience was completely different.
Scenario 3: The Question That Revealed the Outfitter
A travel agent asked two outfitters the same question: "What does the last hour of day three feel like for someone who's been riding at 70% of their capacity?" One outfitter responded with the elevation profile. The other said: "They'll be on a gentle descent through walnut groves with the village visible ahead. The trail is smooth enough that they can look around instead of staring at their front wheel. Most riders start smiling about 20 minutes before the finish." The agent booked the second outfitter. The reviews confirmed the decision.
Common Mistakes and Pitfalls in Trail Assessment
The most predictable failure is over-reliance on a single difficulty metric. A trail rated "blue" or "intermediate" communicates almost nothing about how it will feel on the third consecutive day of riding at altitude. Treat ratings as a starting point for conversation, not as a conclusion.
Another common error is planning for conditions, not for people. Trail assessments describe terrain. They don't describe the 46-year-old who skipped breakfast because altitude killed their appetite, or the strong rider who's quietly nursing a sore knee. The best trail plan in the world fails if it doesn't flex for the humans on it.
Ignoring the psychological dimension is equally damaging. Research confirms that risk perception and psychological strain are legitimate components of trail difficulty. A narrow trail with a steep drop-off might be physically easy but mentally exhausting. After three days of that, even confident riders start riding the brakes.
Finally, confusing trail amenities with trail quality. A well-marked trail with signage and rest stops can still be a poor choice for your group if the effort curve is wrong. Infrastructure supports experience; it doesn't create it.
What to Do Next
Start with one question. The next time you evaluate a multi-day route for a client group, ask the outfitter or guide: "Walk me through what day three feels like for the slowest rider in a typical group." Listen for specifics. Listen for sensory detail. Listen for evidence that they've watched real people ride this trail on tired legs.
If the answer is a recitation of distance and elevation gain, keep looking. If the answer sounds like someone describing a place they know the way they know their own neighborhood, you've found the kind of partner who understands that navigating terrain is about people, not just profiles.
You don't need to become a trail expert. You need to become fluent in the right questions. Use this guide as a reference, not a checklist. Revisit it before each trip you plan, and notice how your instincts sharpen with each conversation. The gap between what trail descriptions tell you and what your group will feel is real. But it's also bridgeable, one good question at a time.
Frequently Asked Questions
What is the ITRS and how does it assess trails?
The IMBA Trail Difficulty Rating System (often referenced as ITRS) uses a color-coded system similar to ski resorts to communicate technical challenge. It evaluates trail width, surface type, obstacles, and steepness. However, IMBA explicitly states that the rating addresses technical skill demand only. Physical exertion factors like trail length, total elevation gain, and average grade are meant to be presented separately so riders can judge effort for themselves.
Why can't a single difficulty rating predict how a trail will feel?
Because a single label collapses multiple distinct variables into one word. Surface type, technical features, climbing difficulty, and distance each affect riders differently. A trail can be technically easy but physically brutal, or technically demanding but short enough that fitness barely matters. When you add cumulative fatigue from previous riding days, altitude, heat, and group dynamics, the gap between the label and the lived experience widens further.
How should I evaluate technical difficulty versus endurance in trail profiles?
Treat them as separate assessments. Technical difficulty asks: "Does this rider have the bike-handling skills to navigate these features safely?" Endurance asks: "Does this rider have the fitness to sustain effort over this distance and elevation at this point in the trip?" A rider might have excellent skills but poor stamina, or vice versa. For multi-day trips, endurance assessment should factor in cumulative load, not just the demand of a single day.
What hidden factors most commonly affect group experience on multi-day rides?
Sun exposure, wind, altitude, surface looseness, and the placement of the hardest effort within the day are the most frequently underestimated variables. Psychological factors also matter: trail exposure (drop-offs, narrow ridgelines), unfamiliar terrain types, and the emotional weight of knowing there's another full day of riding tomorrow. These factors compound over consecutive days in ways that trail descriptions can't capture.
How can I tell if an outfitter truly knows their trails?
Ask experiential questions, not data questions. Instead of "What's the elevation gain on day three?" ask "What does the last hour of day three feel like for a tired rider?" Guides with deep local knowledge will answer with sensory detail, specific landmarks, and references to how past groups have responded. They'll describe the feel of the trail, not just its measurements. That distinction is the clearest signal of genuine terrain expertise.
When should I prioritize trail amenities and safety infrastructure in trip selection?
Trail amenities (water points, shade shelters, clear signage, vehicle access points) matter most when you're working with groups that include less experienced riders or when the route passes through remote terrain with limited bail-out options. They're important, but they shouldn't be confused with route quality. A well-supported trail with the wrong effort curve for your group will still produce a poor experience. Prioritize route fit first, then evaluate amenity support as a secondary factor.